PVC Wall Panel Installation in Pakistan: Process, Tools and Cost
PVC wall panel installation involves no wet work, which makes it much quicker and cleaner than tiling or plastering. This page explains the process, the tools, the two fixing methods, what each panel type needs and what the installation add-on costs. For the full do-it-yourself walkthrough, see our step-by-step guide to installing wall panels. This page belongs to our wall panels hub.
How installation works, step by step
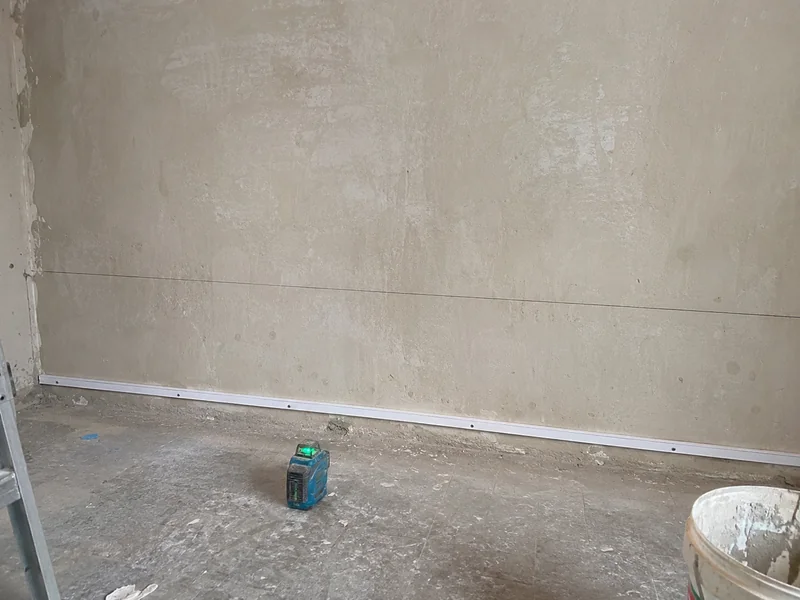
Whatever the panel, the order is the same. Check the wall, measure and mark level lines, fix a starter strip, fit panels one by one with adhesive or on battens, trim the edges and finish with corner and top trims. A tidy result is mostly preparation.
- Prepare the wall: remove loose paint, fill holes, let new plaster cure and wipe off dust.
- Mark the layout: use a spirit level, not the floor, as your reference.
- Fix the starter: glue or screw the first panel exactly plumb; every other panel follows it.
- Fit panels in sequence: slide each tongue into the previous groove and press home.
- Cut around sockets and corners with a fine-tooth saw or knife.
- Trim and seal: fit trims at the corners and top, and seal edges in wet areas.
Adhesive or battens: choosing the fixing method
There are two methods. Fixing with adhesive is the fastest: apply a bead of construction adhesive in a zig-zag, press the panel on and hold briefly. It suits flat, sound walls. Batten fixing uses thin timber or metal strips fixed to the wall first, and the panels are clipped or glued to them; it suits uneven walls and hides cables behind the panels.
Without nails, use adhesive for the body of each panel and finish the end with a glued trim; for a long run, a continuous bead of adhesive and a trim covers the end neatly. For wet areas, choose a moisture-rated adhesive and seal edges and joints with bathroom-grade sealant.
Tools and materials
You do not need a workshop. Most jobs use the hand tools below; panel fitting is done by hand.
| Item | Used for |
|---|---|
| Spirit level and pencil | Marking level and plumb lines |
| Tape measure | Measuring wall and panel lengths |
| Fine-tooth saw or sharp knife | Cutting PVC and WPC panels |
| Construction adhesive and gun | Fixing panels to the wall |
| Mitre box | Cutting trims at 45 degrees |
| Sealant | Sealing joints in wet areas |

Checking the wall before you start
Most problems come from the wall, not the panel. Check that the wall is dry, because damp lifts adhesive; that fresh plaster has cured; and that the surface is reasonably flat, which you can test with a long level. Mark sockets and switches before you cut. Decide where electrical work, such as light points or TV sockets, will go, and finish it before panelling.
What each panel type needs
PVC and WPC panels
Fit tongue-and-groove panels in sequence, with adhesive or on battens. WPC is heavier, so batten fixing and a firm starter are worth the extra care.
3D panels
3D tiles are fitted with adhesive on a flat wall, one tile at a time, matching the pattern edges. Start from a level line and keep joints tight.
MDF, hardboard and wood
These use adhesive or battens in dry rooms only. On plaster walls, let the plaster dry fully, fix battens, then glue and pin the boards. Decorative framed designs start with a flat backing, then the frames go on layout lines before painting.
Fabric and padded panels
Padded panels use a mounting rail or adhesive. They are lighter, but the wall must be flat, and they are common behind beds.
Acoustic panels
Acoustic panels go on with adhesive or clips on a flat wall; see our acoustic panels range for options.
Framed moulding on top of panels is covered in our wall panel moulding guide.

Bathrooms and shower walls
The process is the same with extra sealing. Waterproof the wall base, dry-fit the panels, glue them with a moisture-rated adhesive, leave a small expansion gap at the corners and seal it. Seal the top edge and any joint around the tray and taps. See our waterproof wall panels page for material choices.
Ceiling panels and LED lights
Ceiling panels use a light frame of battens fixed to the ceiling, with panels clipped or screwed to it, working row by row. Have a helper support each panel, and cut openings for lights to size. For a recessed LED panel light, cut a clean opening to the light's size, pass the driver wire through and clip the panel in; the electrical connection should be done by a qualified electrician. If a ceiling is damp, find and fix the leak before fitting anything.

Common mistakes to avoid
- Skipping the level line: panels follow the first one, so a crooked start shows across the whole wall.
- Too little adhesive or the wrong type: panels lift at the edges; use an adhesive suited to PVC.
- No expansion gap: leave a few millimetres at corners and edges, and cover with trims.
- Unsealed wet areas: water behind a panel causes damp and mould.
- Fitting over damp or crumbling plaster: repair it first.
Installation cost per sq ft
Installation is priced per sq ft and depends on the panel. These add-ons are on top of the material rate.
| Panel | Installation add-on (per sq ft) | Material only or installed | Delivery area |
|---|---|---|---|
| PVC wall panels (4 - 10 mm) | Rs 30 - 50 | Installation only (material extra) | Installation in Lahore |
| PVC louver panels | Rs 30 - 50 | Installation only (material extra) | Installation in Lahore |
| WPC wall panels | Rs 60 - 100 | Installation only (material extra) | Installation in Lahore |
| Fluted or 3D panels (PVC) | Rs 30 - 50 | Installation only (material extra) | Installation in Lahore |
| Fluted or 3D panels (WPC) | Rs 60 - 100 | Installation only (material extra) | Installation in Lahore |
| Delivery charges | Get today's rate on WhatsApp | Depends on city | Supply across Pakistan |
. A complete built media wall includes installation in its rate. For material rates see the PVC wall panels and WPC wall panels pages, or estimate your wall with the PVC wall panel cost calculator.
Frequently Asked Questions
Prepare a clean, dry, flat wall, mark level lines, fix a starter strip plumb, then fit each panel by sliding its tongue into the last groove, with adhesive or on battens. Finish with trims at corners and the top, and seal edges in wet areas.
Apply a zig-zag bead of construction adhesive, press the panel on and hold it briefly. This suits flat, sound walls and is the fastest method. For uneven walls, fix battens first, then glue or clip the panels onto them. Check the adhesive is suitable for PVC.
Yes. Use construction adhesive for the body of the panel and finish the end with a glued trim. For a long run, a continuous bead of adhesive and a trim covers the end neatly. Wet areas need moisture-rated adhesive and sealed edges.
Installation adds Rs 30 to 50 per sq ft for PVC and louver panels, and Rs 60 to 100 for WPC panels, on top of the material rate. Delivery charges depend on the city, so get today's rate on WhatsApp.
Fix a light frame of battens to the ceiling, then clip or screw the panels to it, working row by row. Cut openings for lights to size, and have a helper support each panel. Wiring for lights should be done by an electrician.
Prepare and waterproof the wall base, dry-fit the panels, glue them with a moisture-rated adhesive, leave a small gap at corners and seal every joint and edge with bathroom sealant. Fit trims last, and let everything cure before the first use.
Yes. We supply panels across Pakistan and arrange installation in Lahore, in homes and offices. Send the wall size, a photo and the panel type you want on WhatsApp, and we will quote supply and fitting together in one clear message.
Need your panels fitted?
Send the wall size and a photo. We will quote supply and installation in Lahore.